Manage Conditions
Creating and Managing Conditions and Condition Types in Genova
This guide provides a step-by-step process for creating new conditions and condition types within the Vanguard Genova system. Each step includes a screenshot to visually guide you through the process, ensuring a smooth and efficient workflow. Follow these instructions carefully to avoid errors.
Start url: http://localhost/vanguard-genova/cia/admin/
Tab Name: Create Deductible - GENOVA INSURANCE
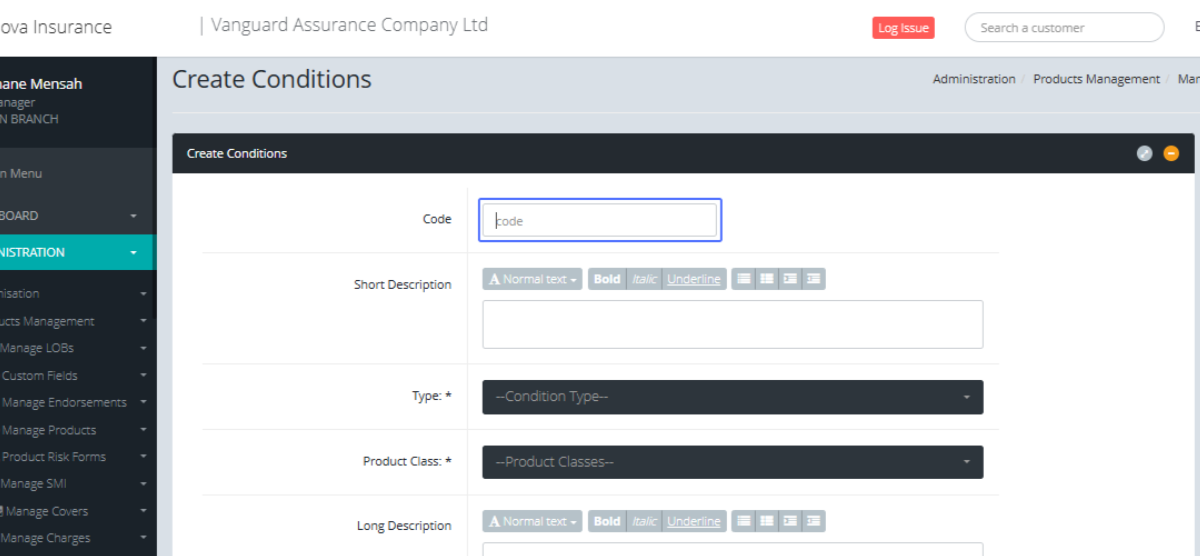
Accessing the "Create Conditions" Page: Click on the “Create Conditions” Button under the Manage Conditions tab.
Tab Name: Create Conditions - GENOVA INSURANCE
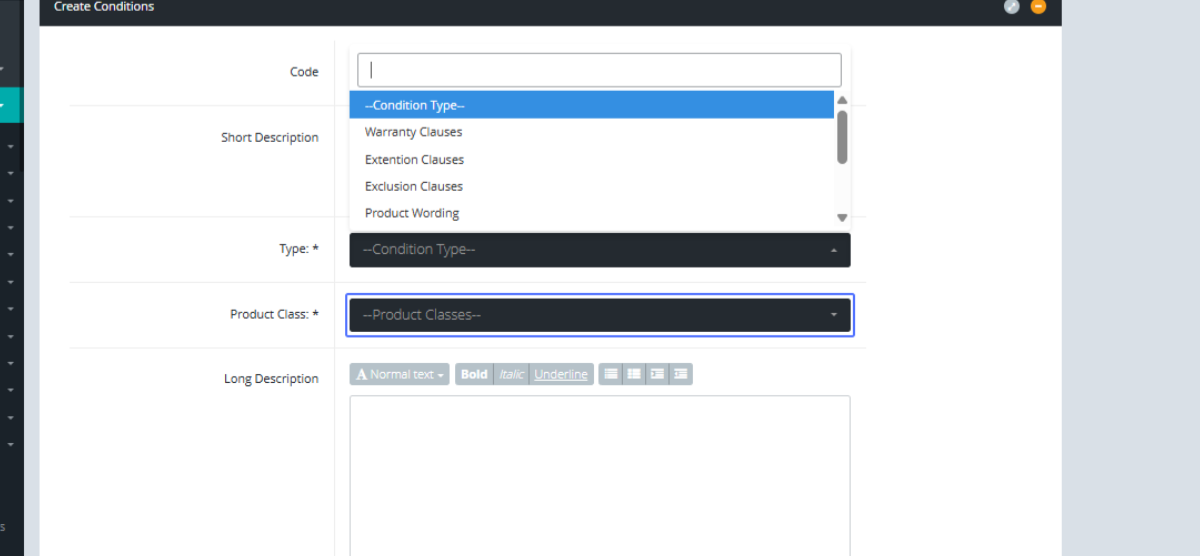
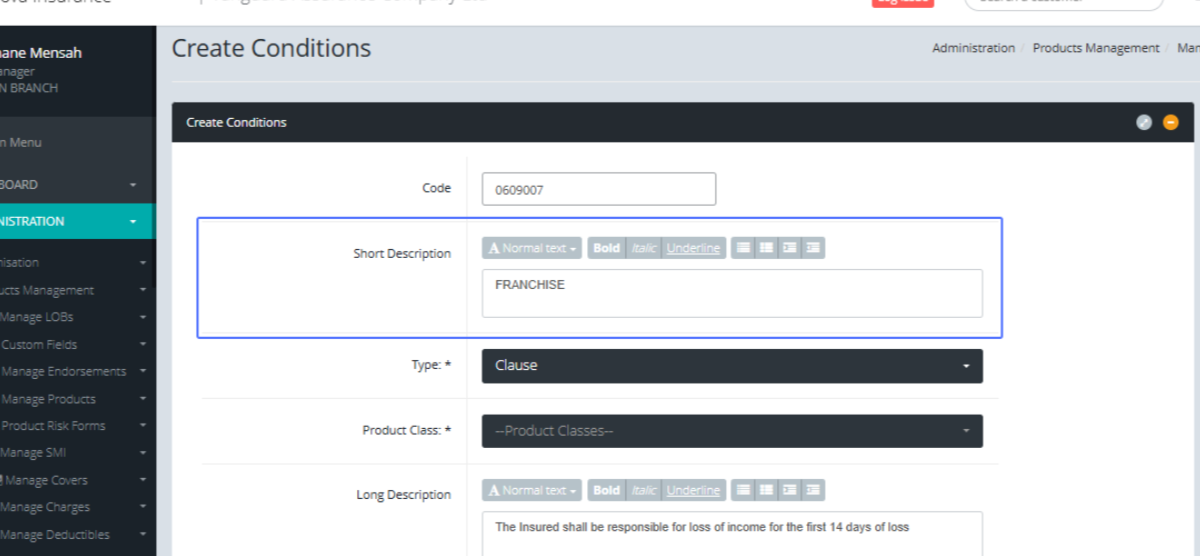
Entering the Condition Code: Enter the Condition Code within the field provided
Tab Name: Create Condition
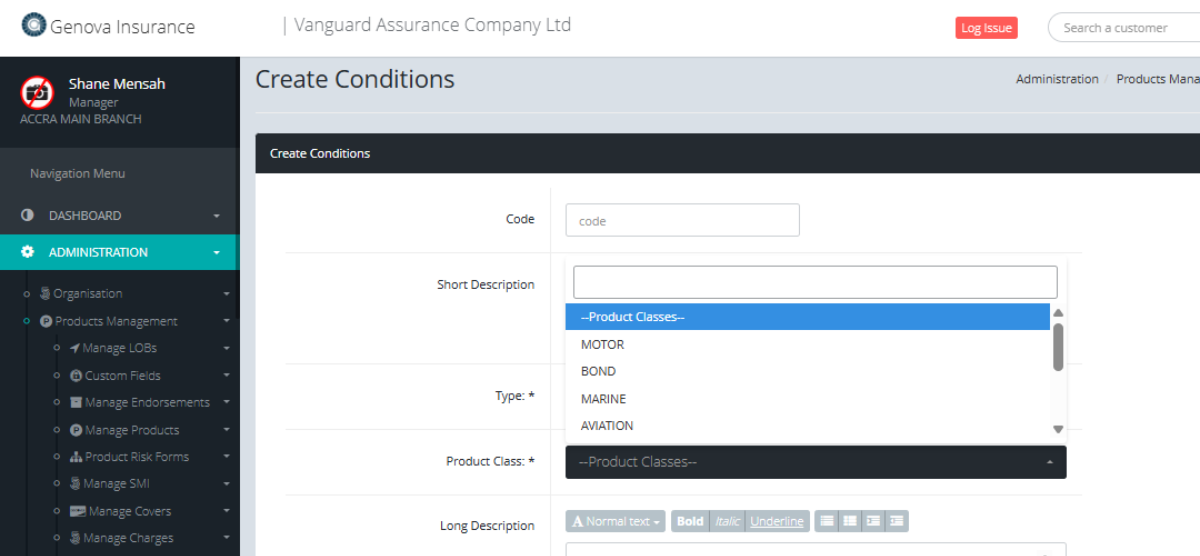
Entering the Short Description: enter the Description of the condition.

Tab Name: Create Conditions - GENOVA INSURANCE
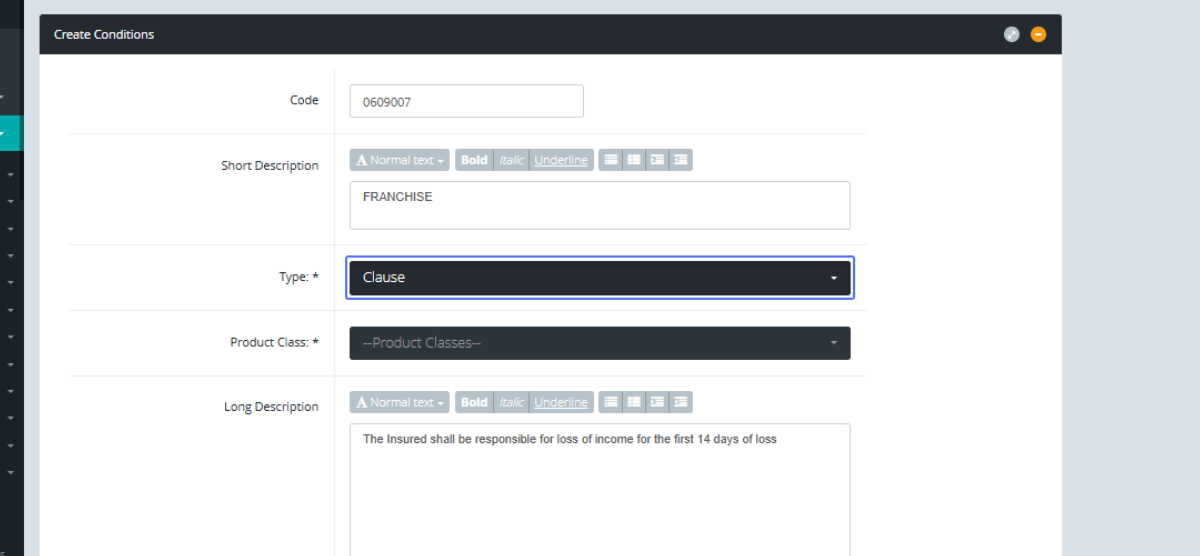
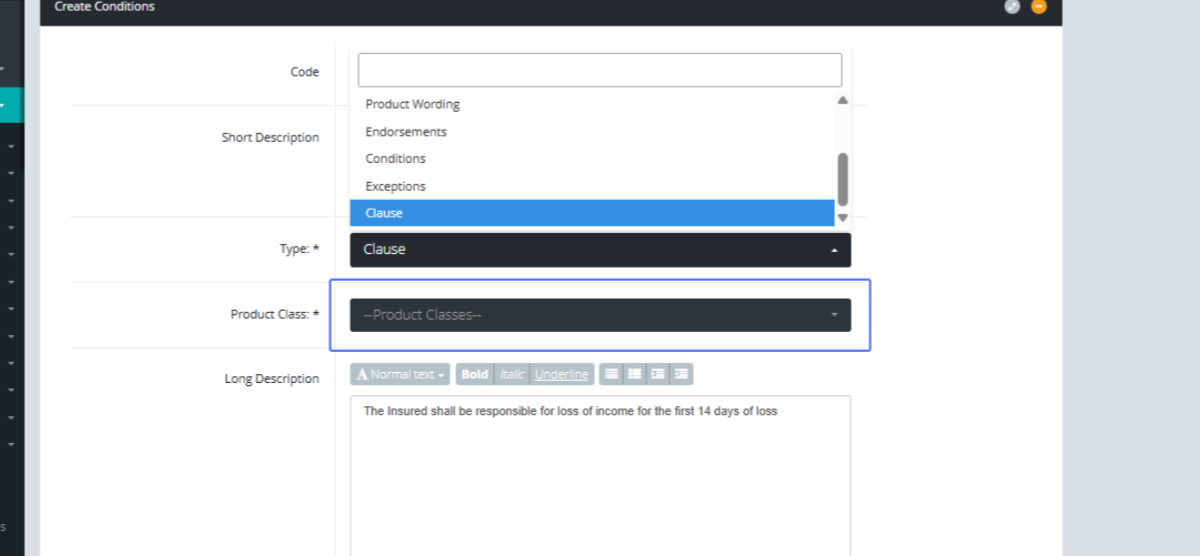
Selecting the Condition Type: Select the Condition Type from the Dropdown list.
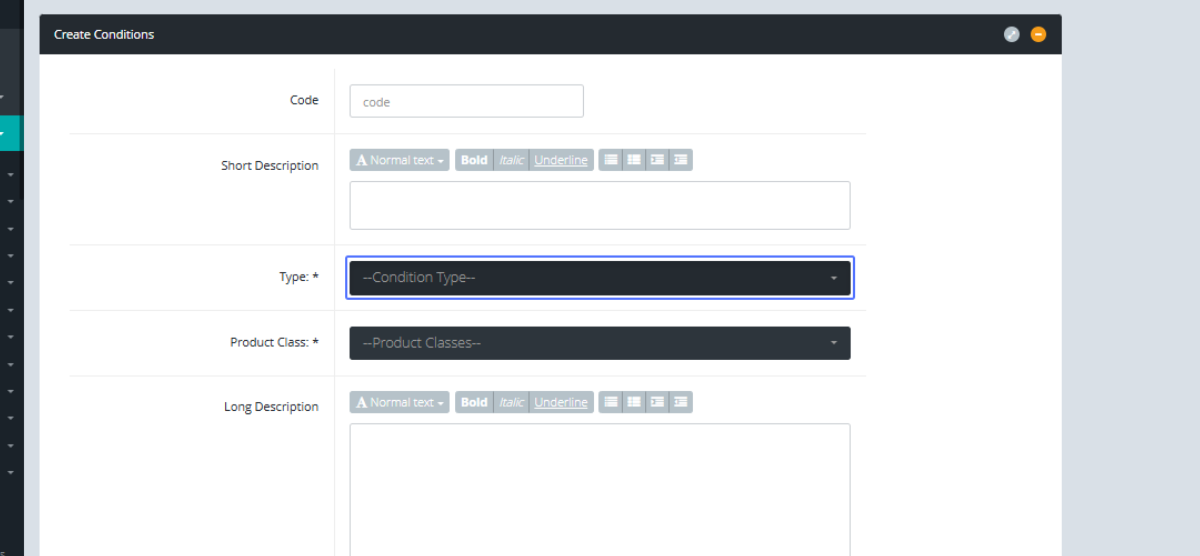
Selecting the Product Class: Select the product Class from the list provided
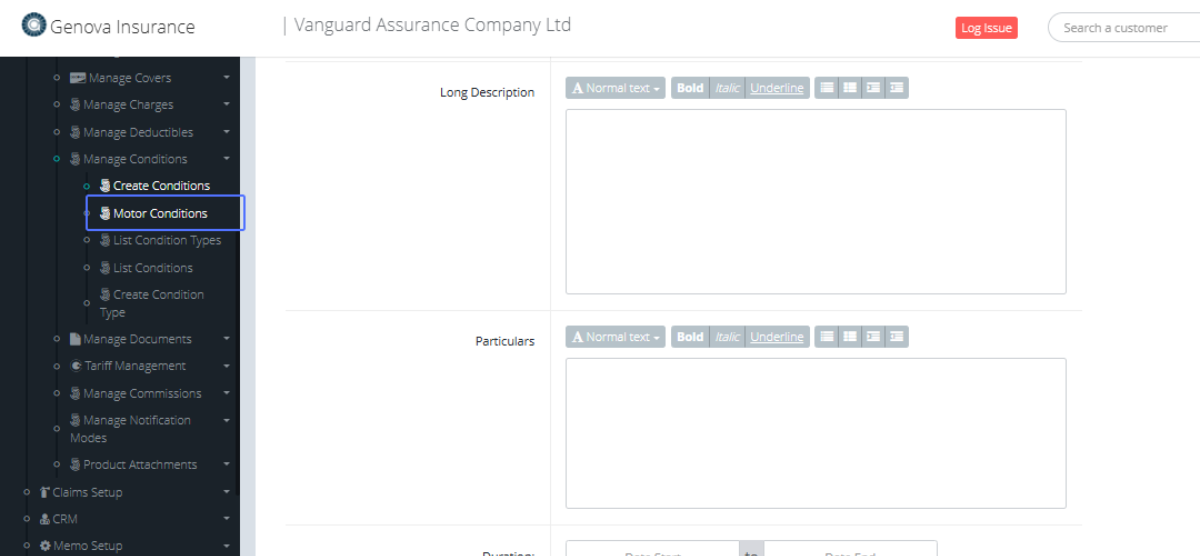
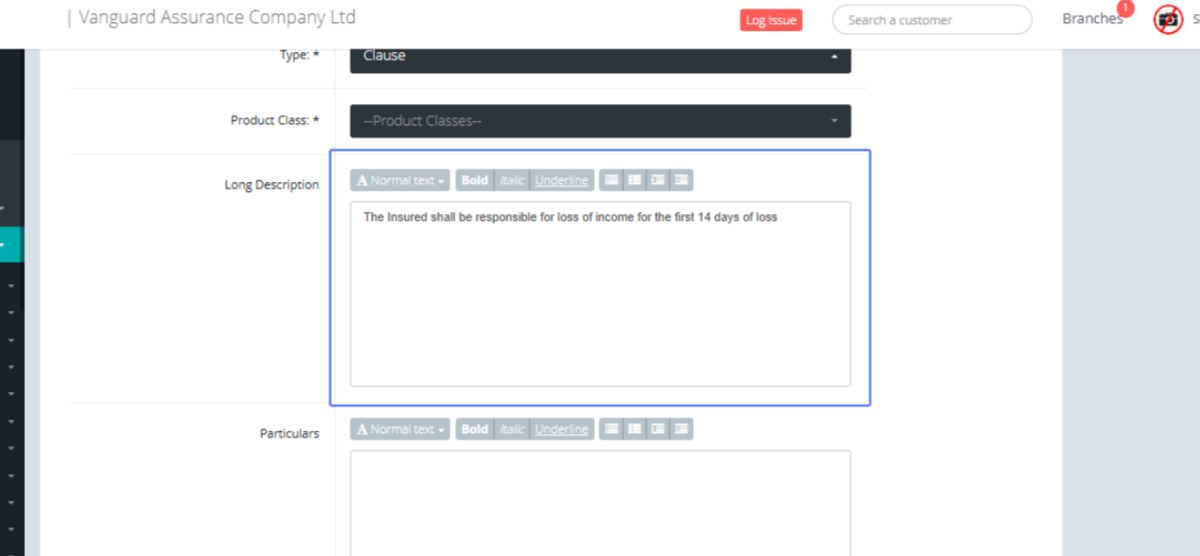
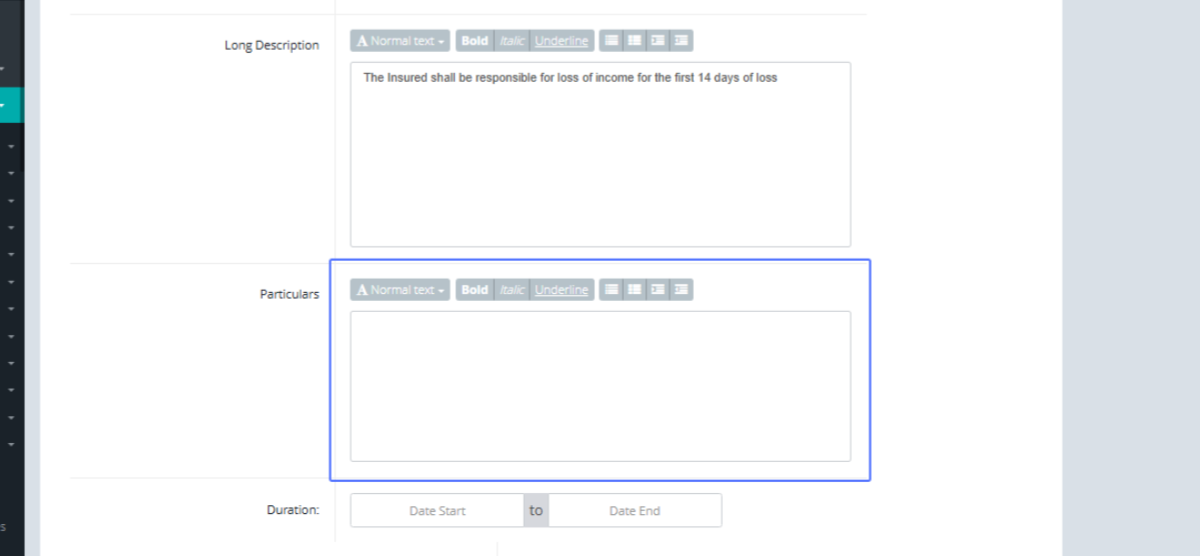
Entering the Long Description: Enter the Long description within the field provided.
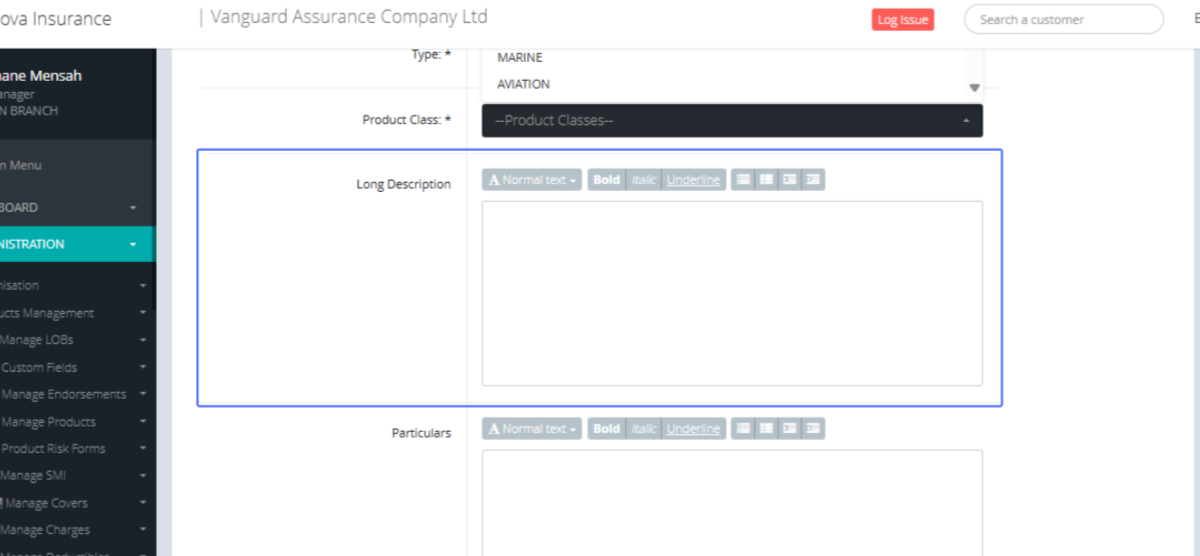
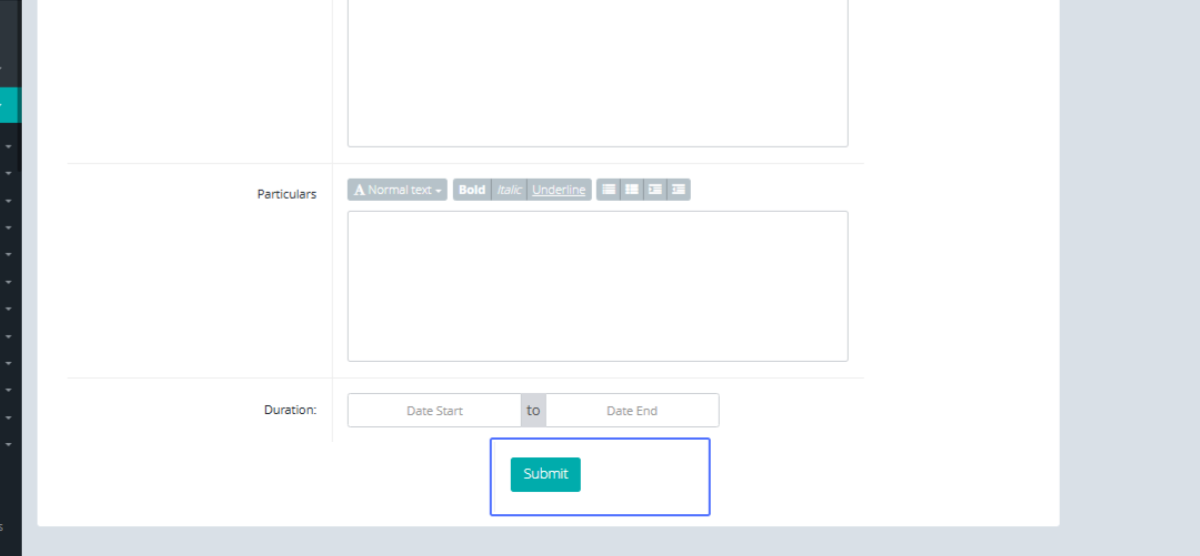
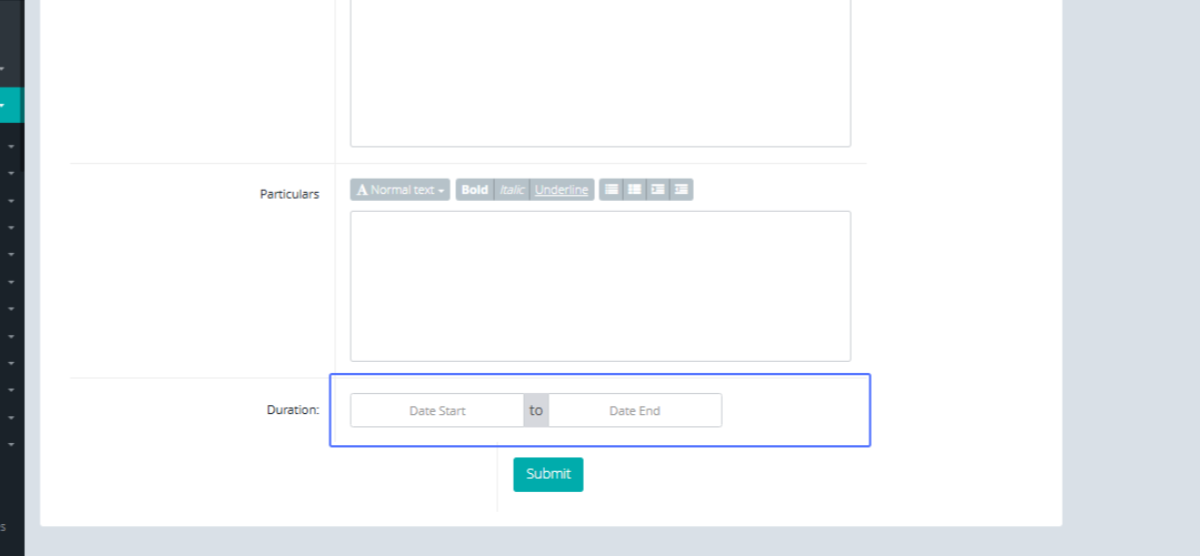
Specifying the Duration: Enter the desired Particulars.
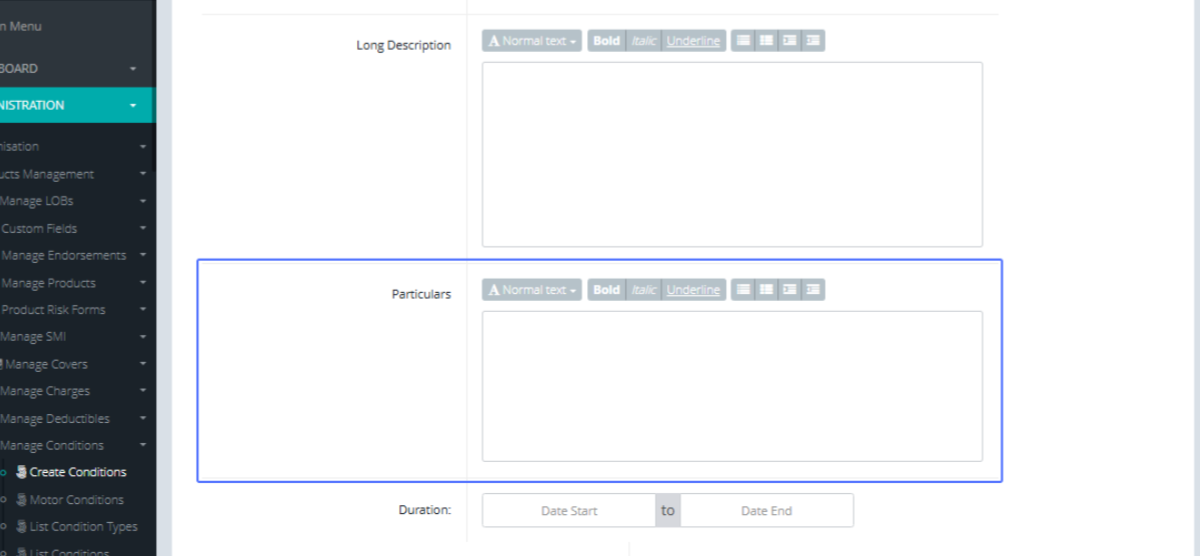
Submitting the New Condition: After all, filling all necessary fields, proceed to select the start and end dates for the particular condition.

Save the Condition: Click on the Submit Button to save the Condition.
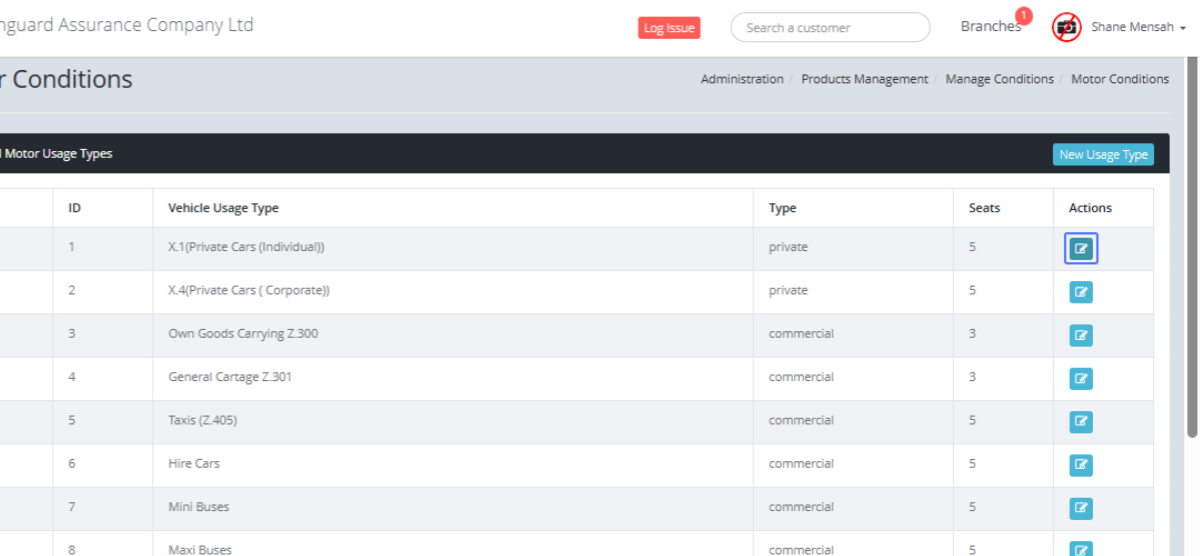
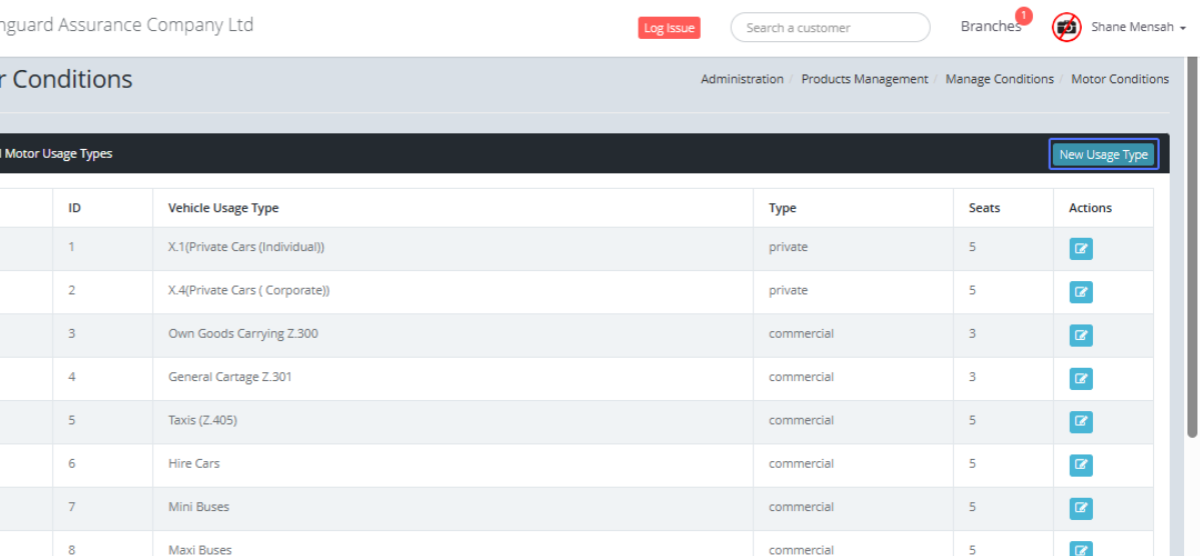
Editing an Existing Motor Condition: To navigate to the Motor Conditions Click the “Motor Conditions” Button under the Manage Conditions section.
On the Motor Conditions page, Click the “Edit” button to edit the specific button.
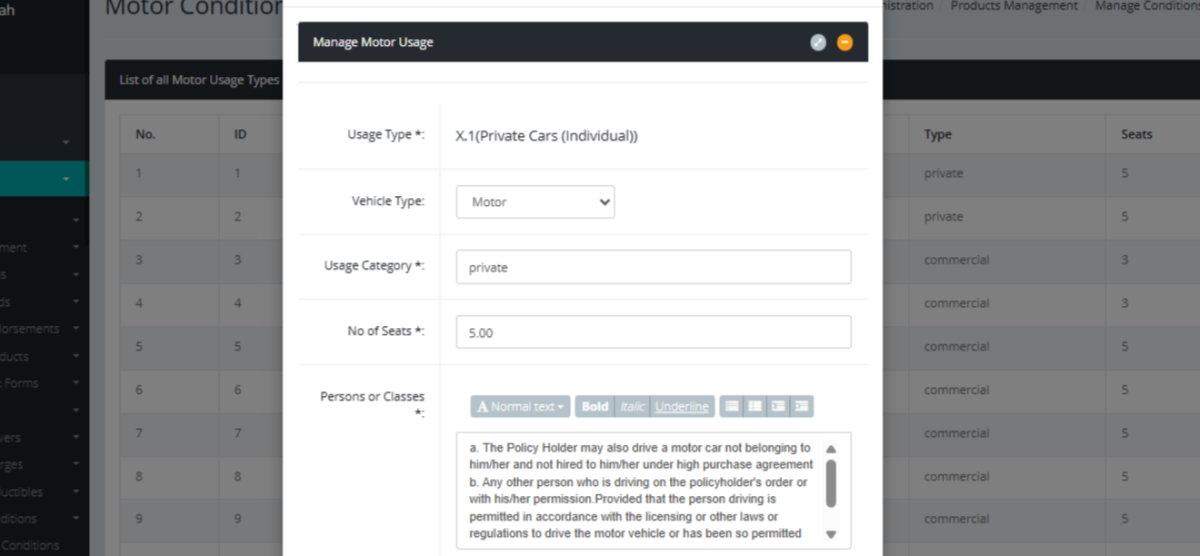
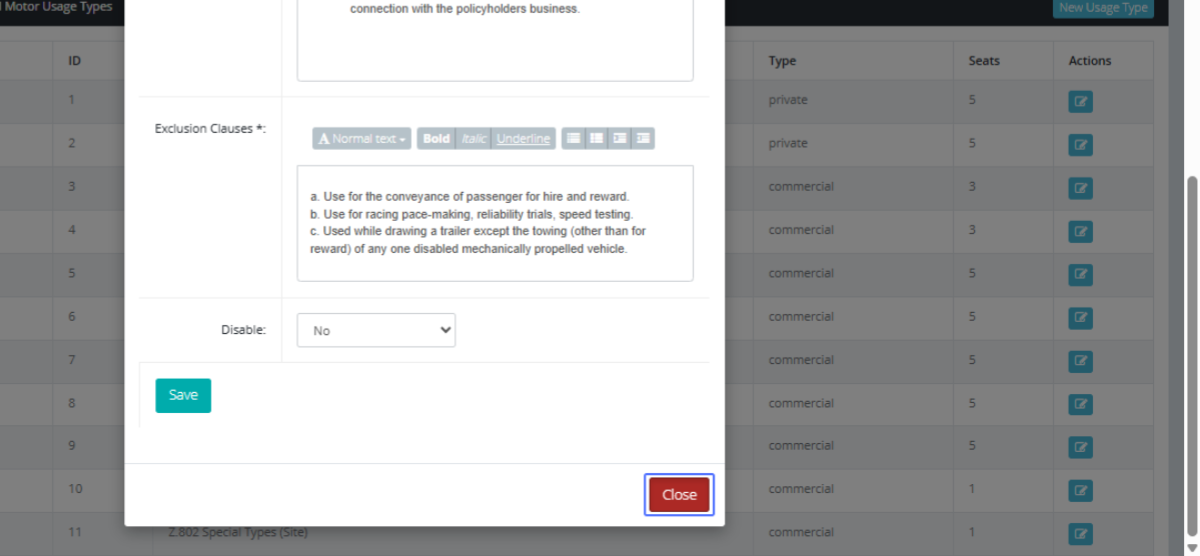
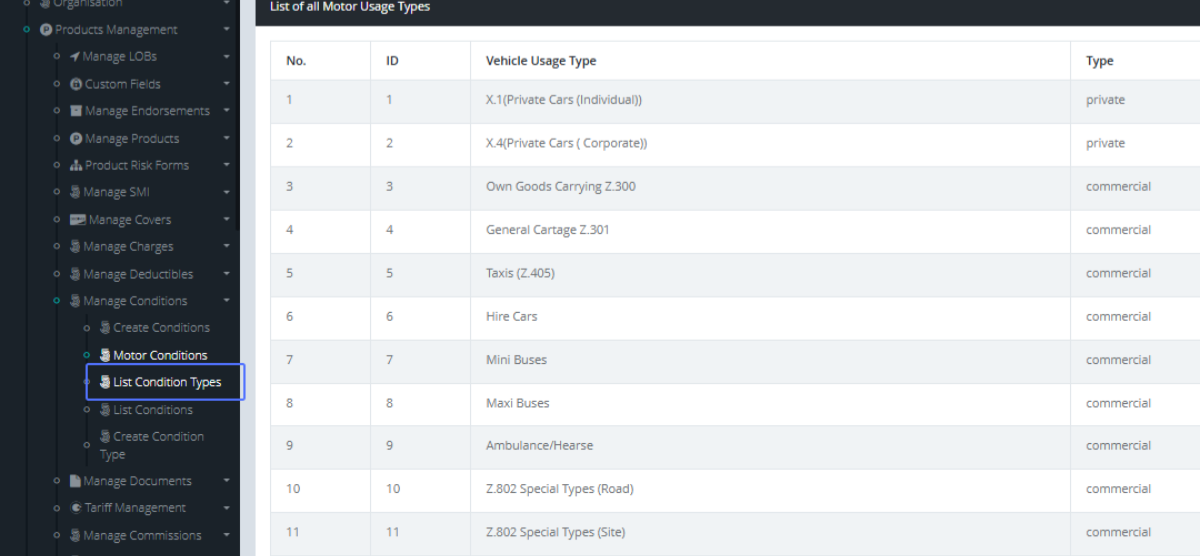
Viewing the "Manage Motor Usage" Form: The Manage motor usage modal then pops up with the form showing the existing data.
Closing the "Manage Usage Type" Modal. After Saving your edits, Close the modal to close it.
Creating a New Motor Usage Type: Add a new Usage type by clicking the New Usage type Button.
Entering the Usage Type : Enter the Usage Type Name within the field provided.
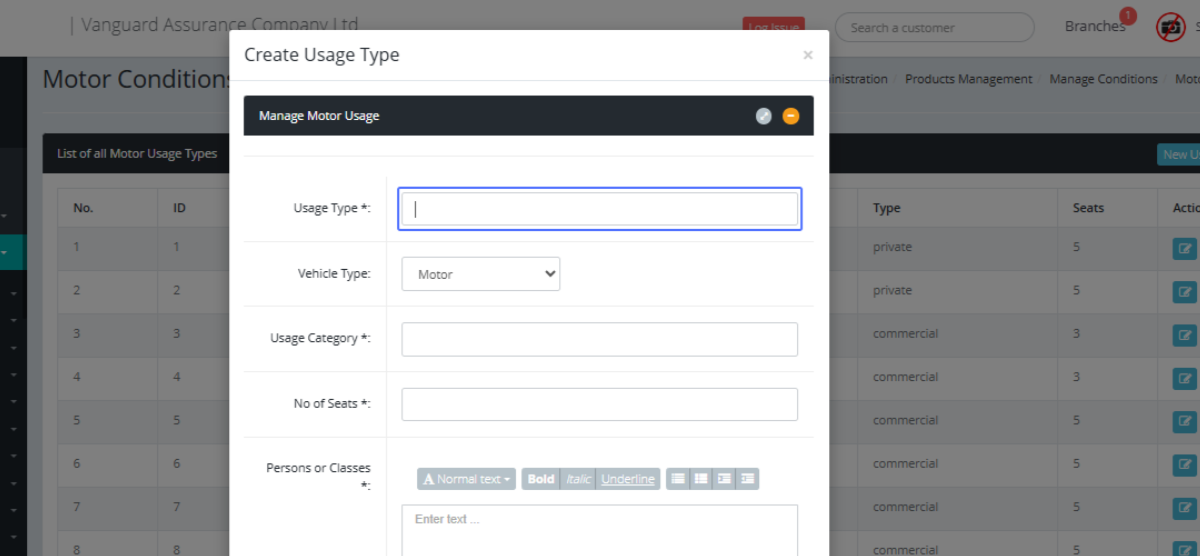
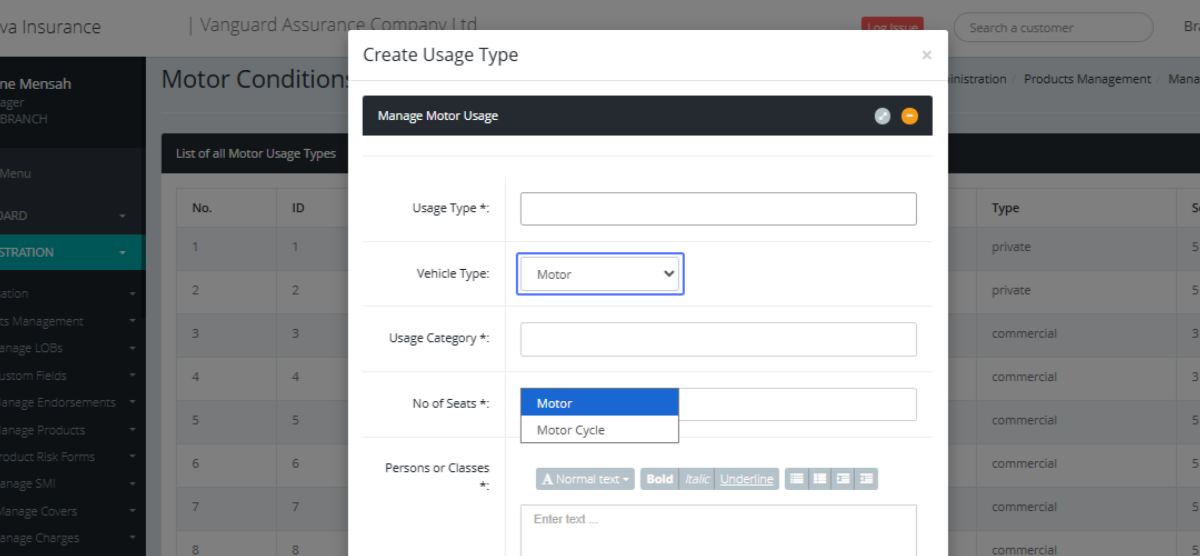
Selecting the Vehicle Type: Select the Vehicle type within the dropdown.
Entering the Usage Category: Enter the user Category within the field provided.
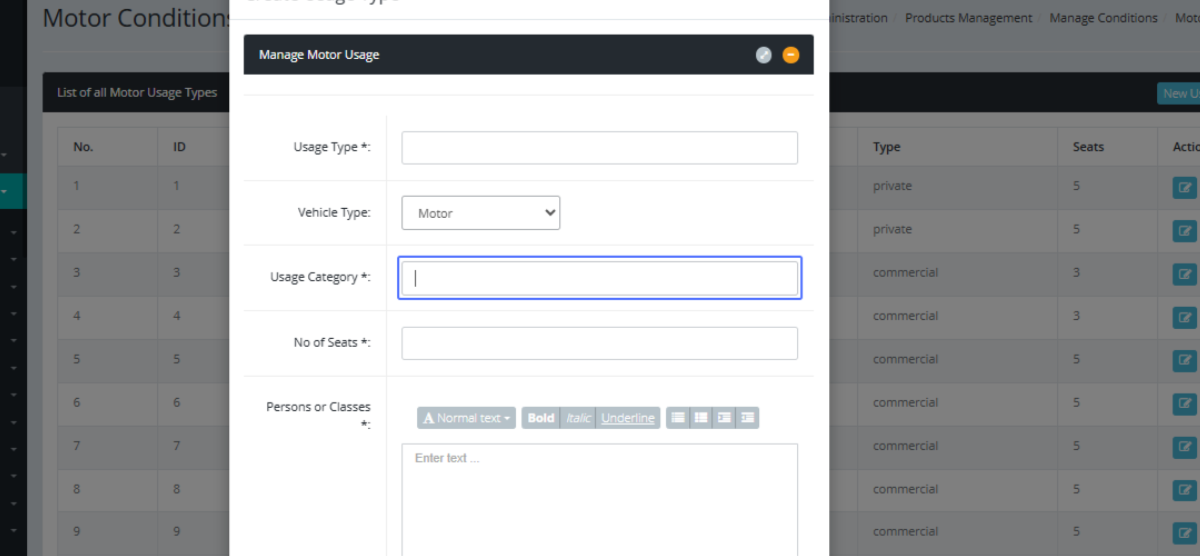
Entering the Number of Seats: Enter the Number of seats within the field provided
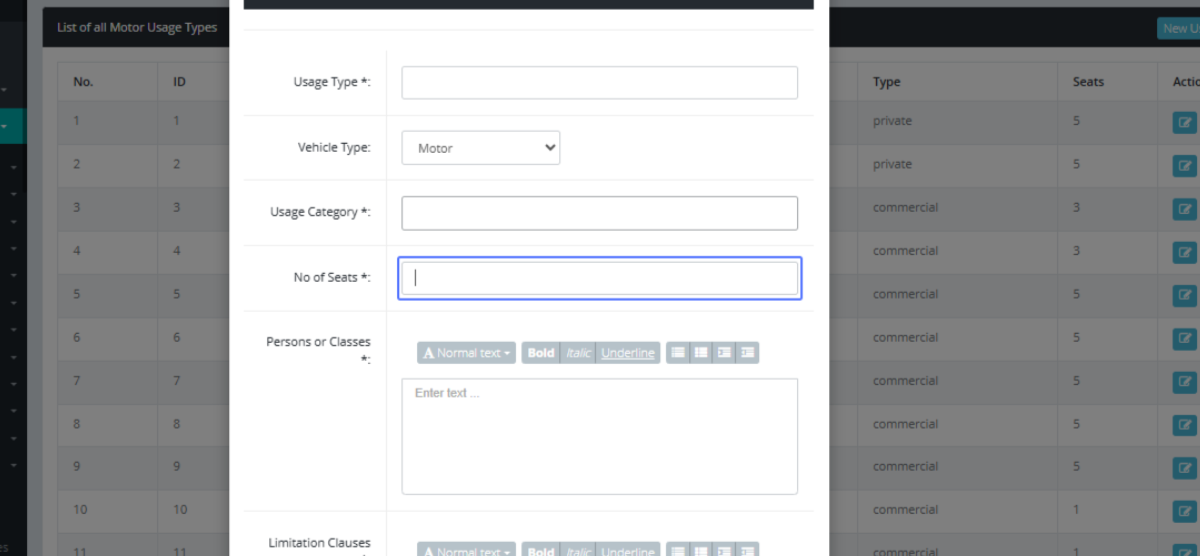
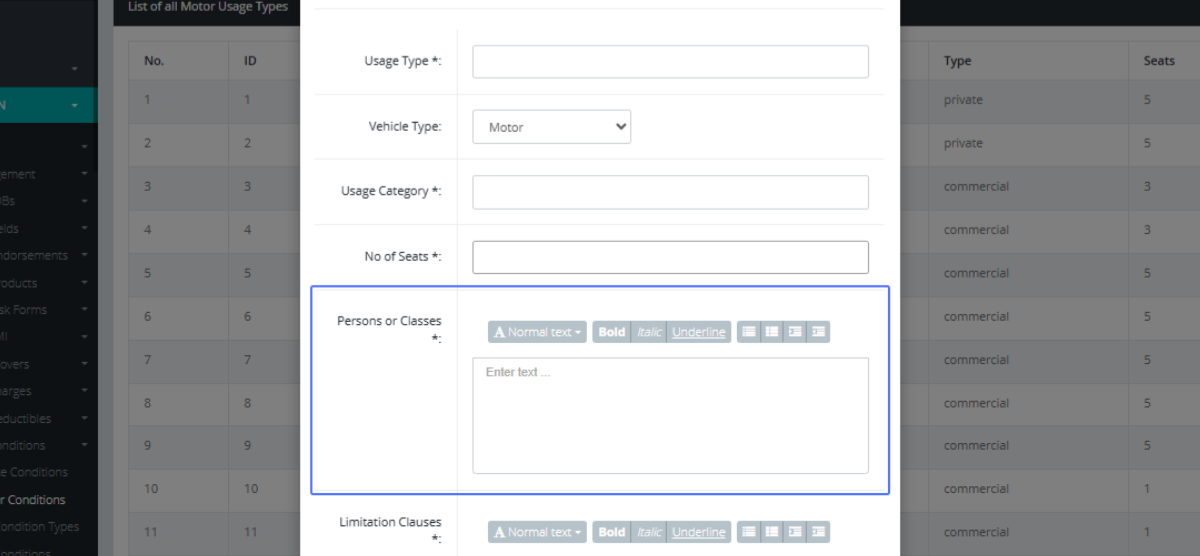
Entering the Persons or Classes: Enter the Persons or Lasses within the field that has been provided.
Entering the Limitation Clauses: Enter the Limitation Clauses within the provided field.
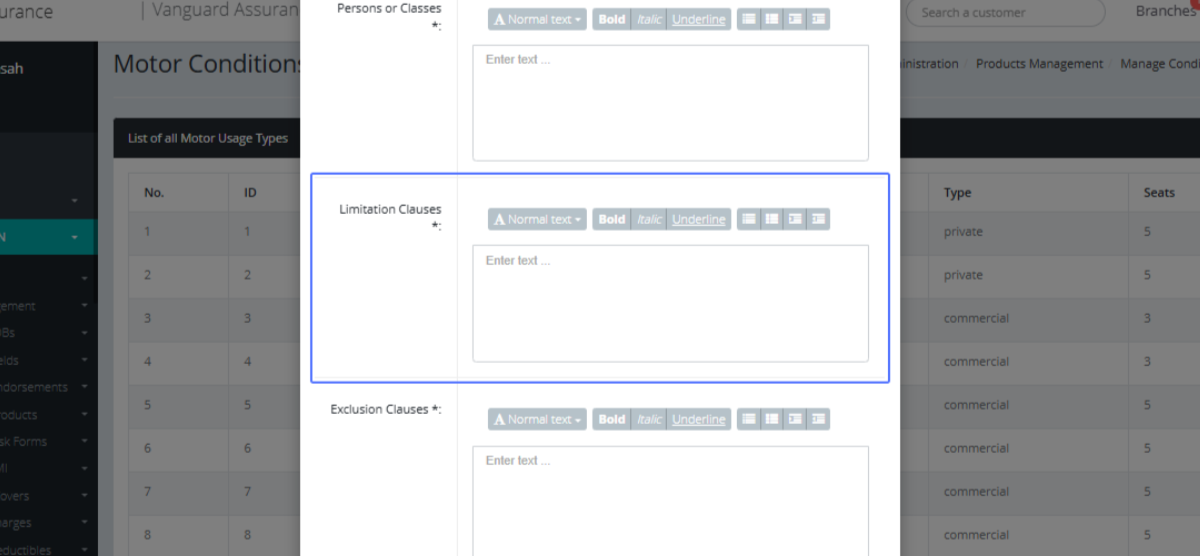
Entering the Exclusion Clauses: Enter the Exclusion Clauses within the provided field
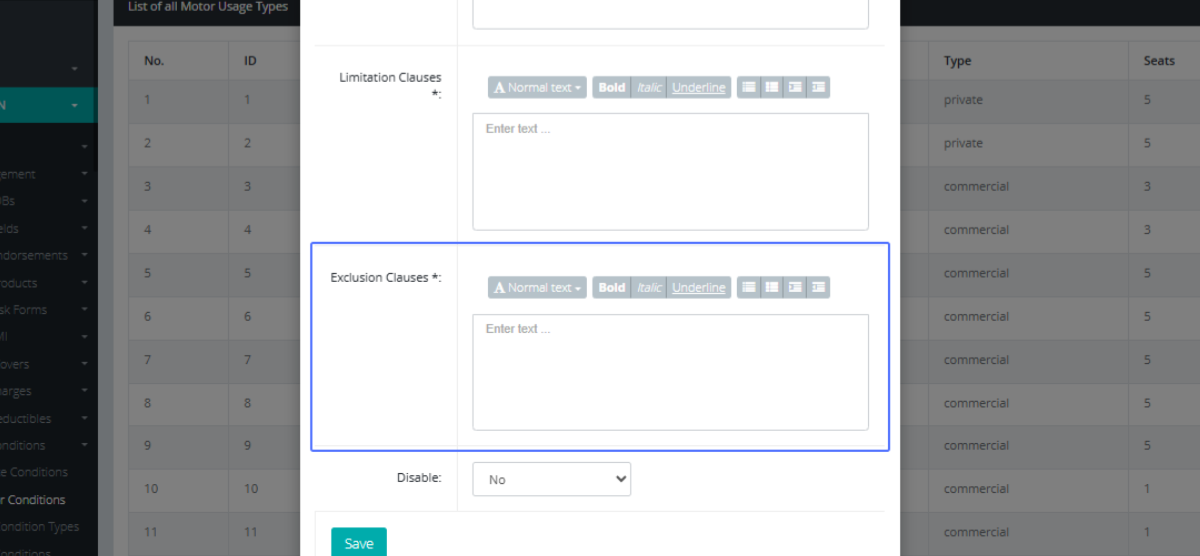
Selecting whether to Disable the Usage Type: Select if the Usage type should be disabled from the dropdown.
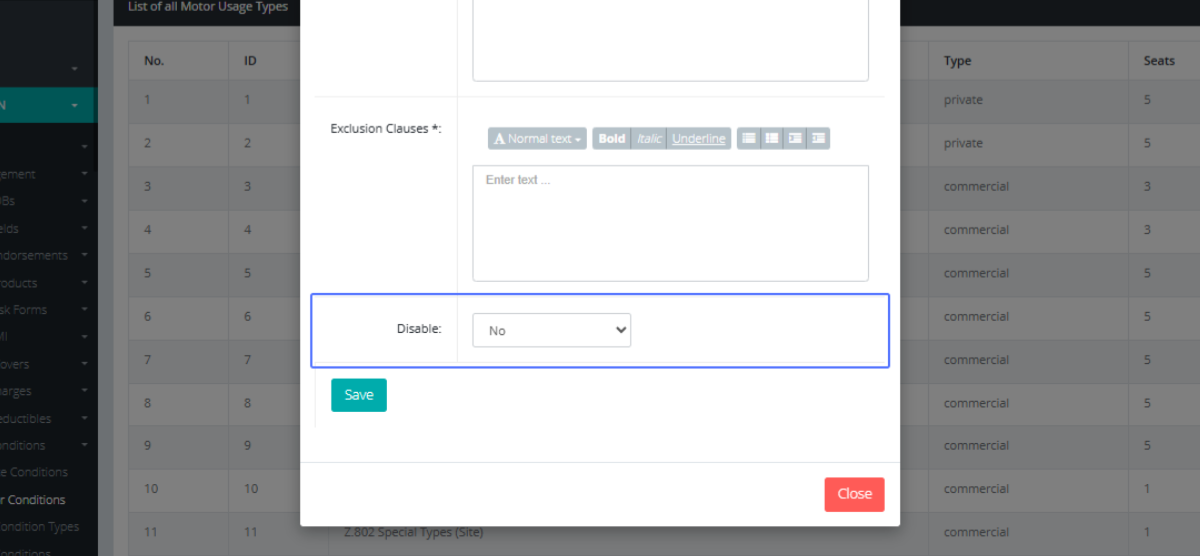
Saving the Motor Usage Type : After every item is taken care of, the user clicks on the “Save” button to save the Usage type.
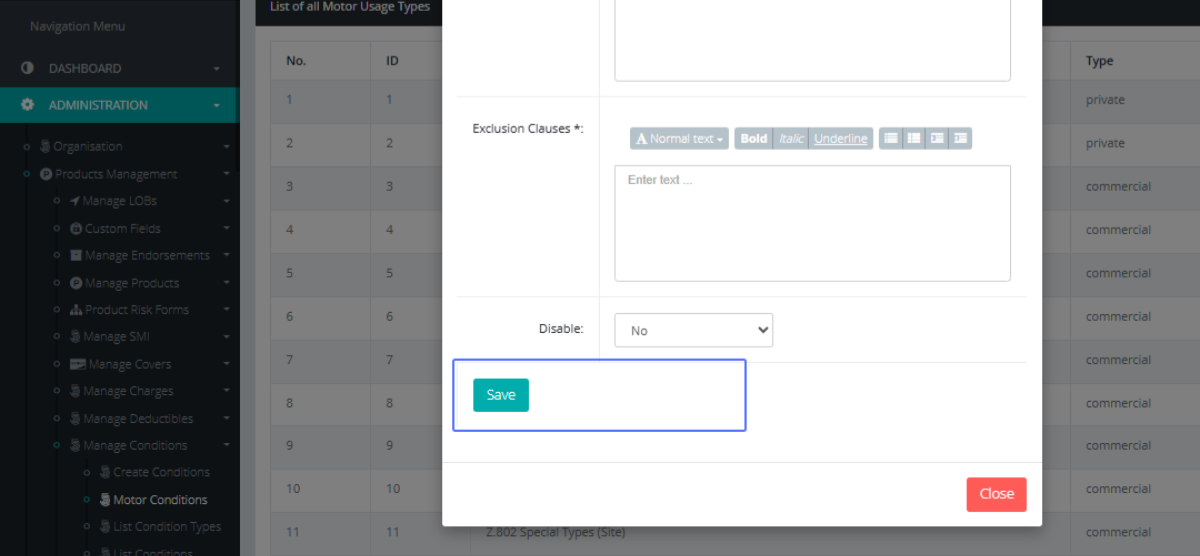
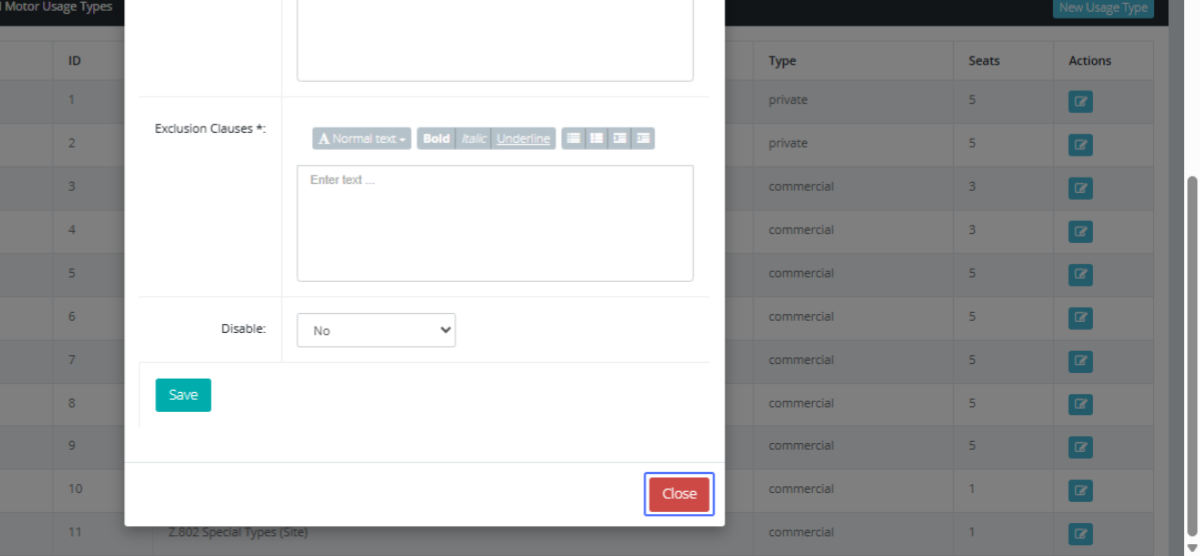
Closing the "Manage Motor Usage" Modal: After the usage type has been saved, click on the “Close” button to dismiss the modal.
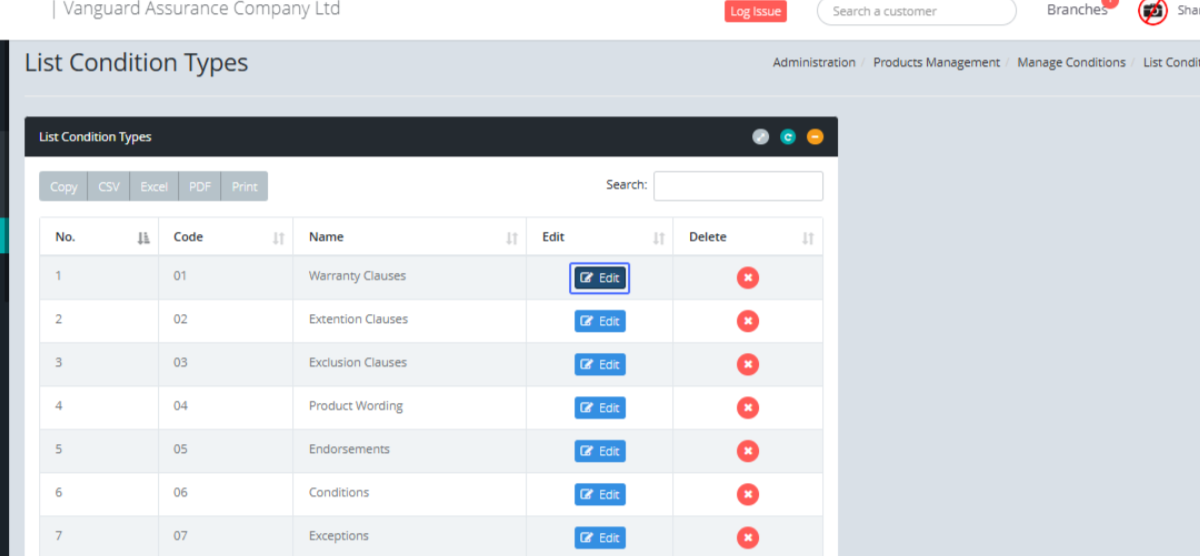
Accessing the "List Condition Types": Click on the “List Condition Types” button to access the condition types within the system.
Tab Name: List Condition Types - GENOVA INSURANCE
Editing a Condition Type: On the List Condition Page, click on the “Edit” button to edit the specific condition type.
Tab Name: Create Condition Type - GENOVA INSURANCE
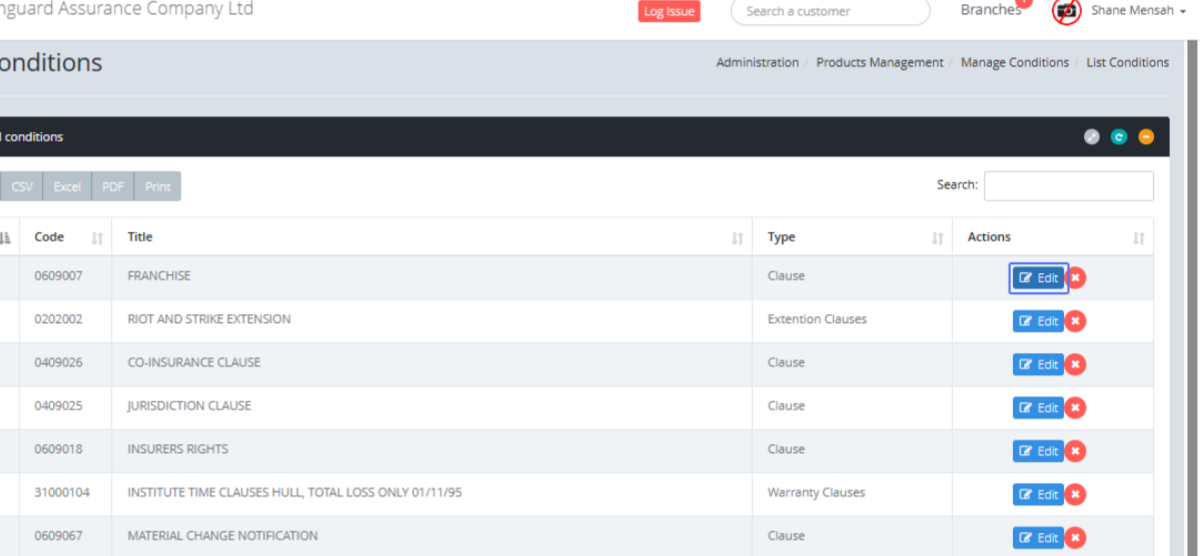
Accessing the "List Conditions" Page: Click on the “List Condition” button to get access to the Conditions within the system.
Tab Name: List Conditions - GENOVA INSURANCE
Editing an Existing Condition: Within the listed Conditions, Click Edit to edit the specific Condition.
Tab Name: Create Conditions - GENOVA INSURANCE
Entering the Condition Code: Within the existing Condition, you can make changes to the existing Condition details.

Entering the Short Description : The users make changes to the existing Description
Selecting the Condition Type: Users Can select the Condition type within the dropdown.
Selecting the Product Class: Select the Product Class from the dropdown list.
Entering the Long Description: Users can also make changes to the Long Description list as well.
Entering the Particulars: the particulars field is also made available to edit as well.
Specifying the Duration: The User can modify the Duration i.e. the Start Date and the End Date.
Submitting the Edited Condition: When the user is done making the changes, Click on the submit button to make the changes.

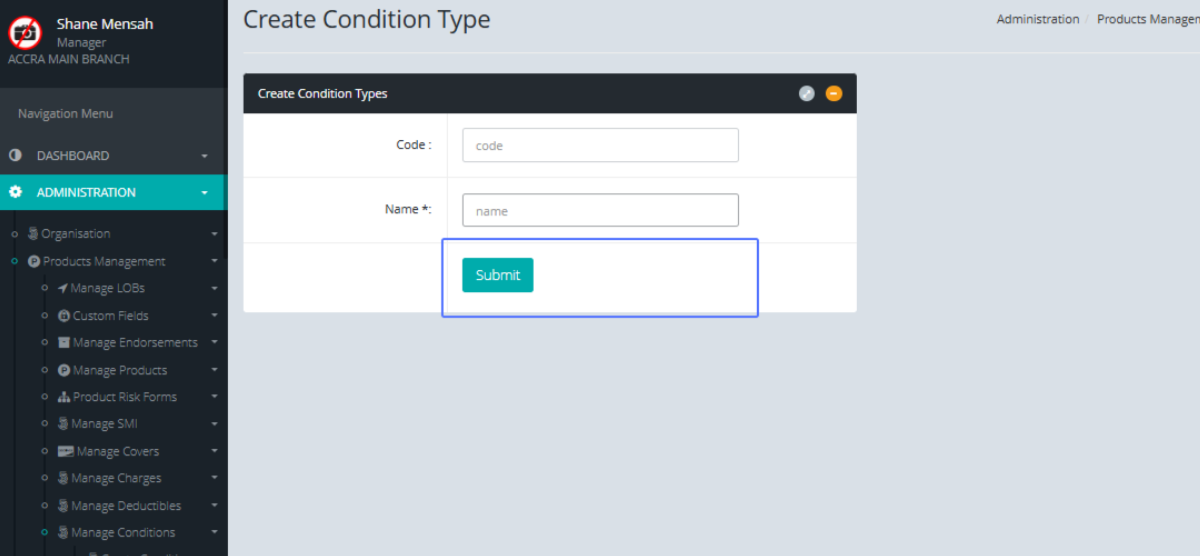
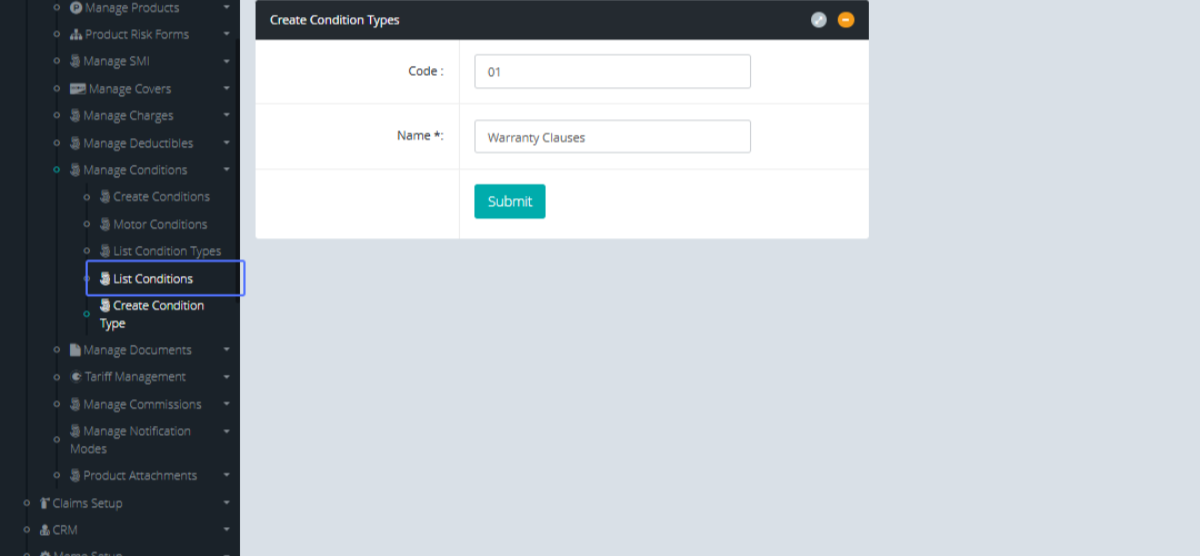
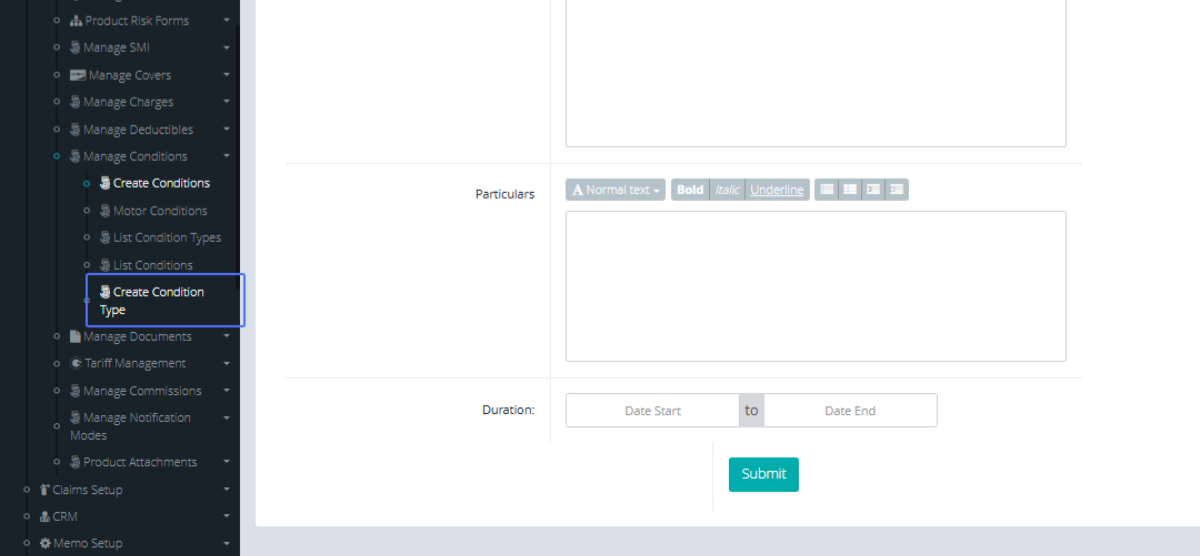
Accessing the "Create Condition Type": To create a new Condition Type, Click the “Create Condition Type” Button under the Manage Conditions list.
Tab Name: Create Condition Type - GENOVA INSURANCE
Entering the Condition Type Code: Enter the Code for the Condition type to create it.
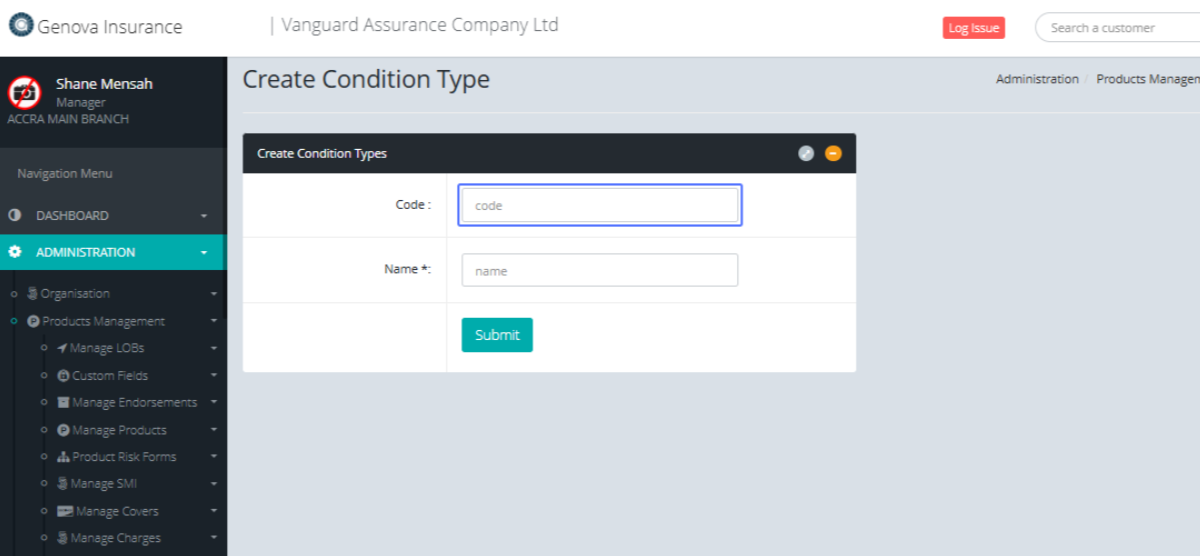
Entering the Condition Type Name: Enter the Name of the Condition type.
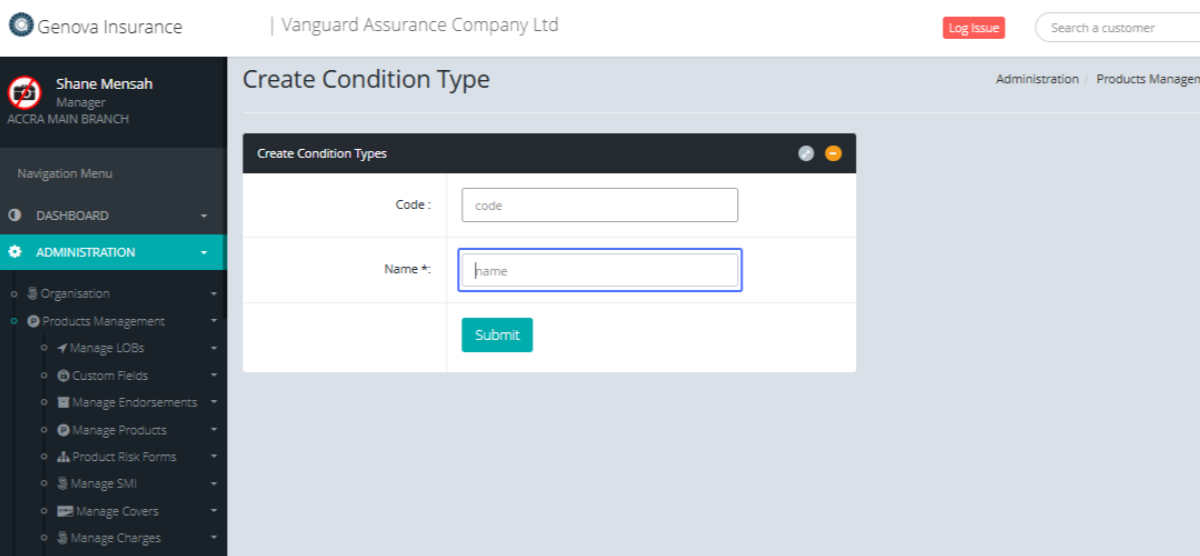
Submitting the New Condition Type : Click on the submit button to create the Condition Type after the all necessary fields have been completed.